Stage info
Main project view, where you can quickly handle the basic stages information and their components.
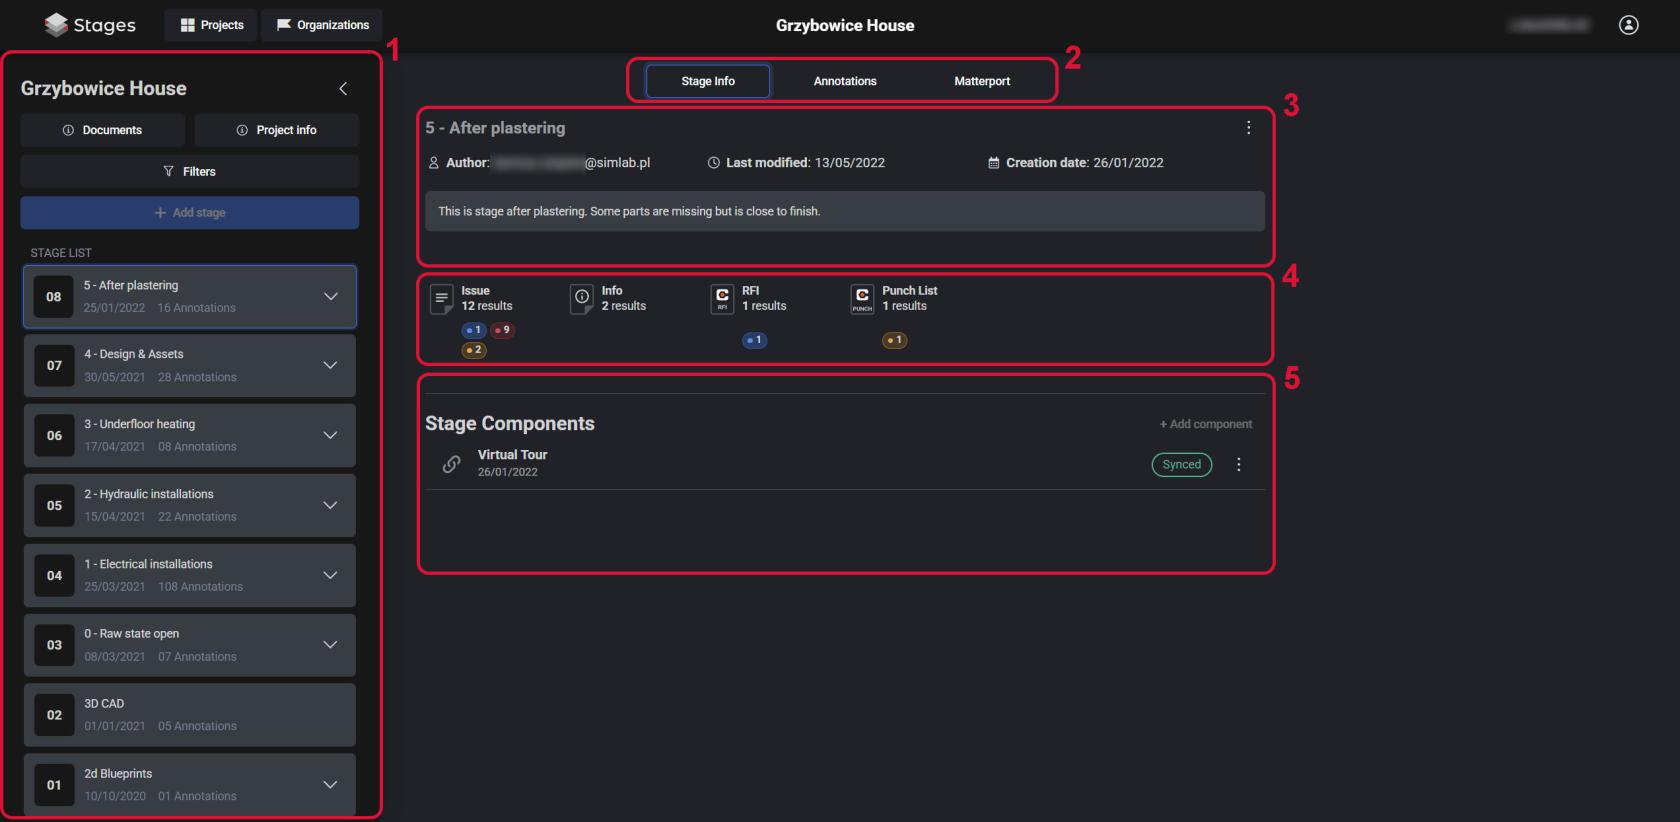
Overview
- Left Side Panel
Upon entering the project, the Stages list will be automatically opened. - View selection
Toggle between 3 main views of the (WEB) Project section. - Stage info
Here is displayed basic information of the currently selected Stage. - Annotations
This section provides a quick information on the type and amount of different types of notation items in the selected stage. - Stage components
List displaying the components of the stage, together with their type, creation date and status (if they are synced).
Stages list
The left side panel from where you can add and manage the stages of a project.
You can open the Project info window from here as well: simply click ![]() button, located at the top of the Stages list panel.
button, located at the top of the Stages list panel.
From here you can open the Documents view by clicking the ![]() button - a centralized File Browser.
button - a centralized File Browser.
Additionally you can invoke the Note Filters window by clicking ![]() button, to the right of Project info button.
button, to the right of Project info button.
Adding stages
To add a stage to the Project, locate the ![]() button, press it, then choose the name for the stage and select the date of it's creation.
button, press it, then choose the name for the stage and select the date of it's creation.
Remember. The Scan Creation Date should be the same as when the Scan was taken, and not when the Stage was created
Managing stages
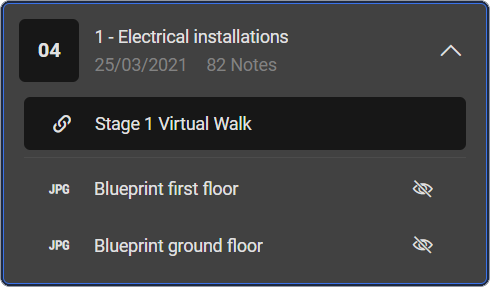 This side panel displays all of the stages inside the project. Each stage has it's own separate tile displaying it's number, name, the scan creation date and amount of notes. Additionally you can expand
 ![]() the tile to reveal the components of that stage and manage the visibility of each of the individual component of that stage.
the tile to reveal the components of that stage and manage the visibility of each of the individual component of that stage.
These are mainly used while in the Matterport view
Quick Access
Collapsing the Left side panel reveals three quick access buttons:
 Show stages list - expands the Stages list side panel on the left
 Notes filters - opens the Note Filters window
 Area Measurement tool - expands the Area Measurement side panel on the right
 Distance Measurement tool - expands the Distance Measurement side panel on the right
Measurement tools will change the main view to the Matterport view if it wasn't already selected
Stage info
From this section of the Stage Panel we can check who is the author of the selected stage, when was it last modified and lastly the creation date of the Stage. Further on there's space for the Stage description.
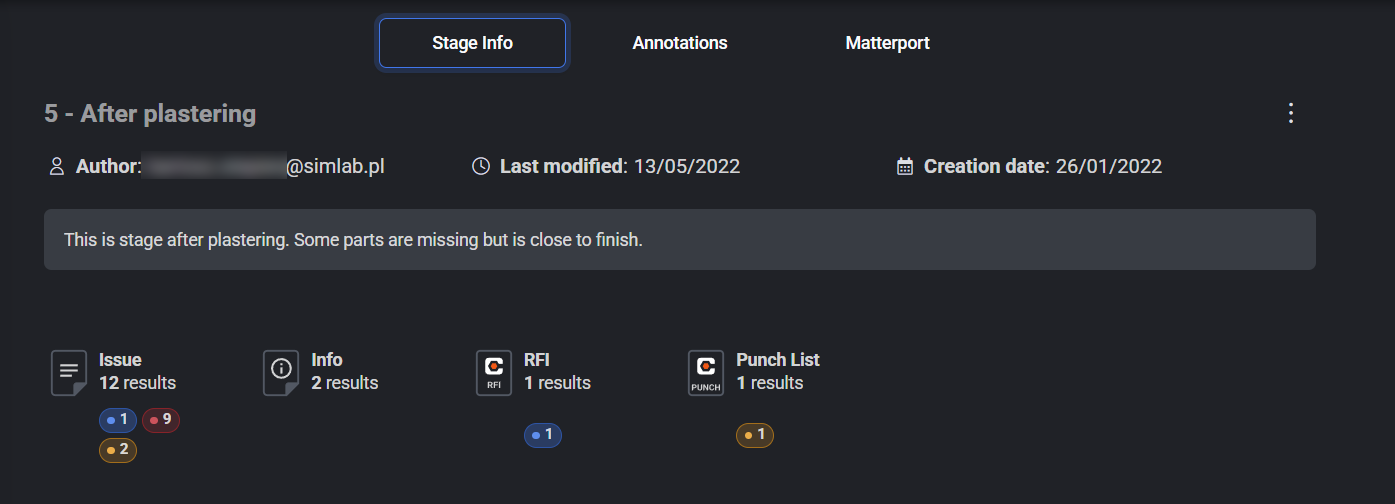
To edit the stage information, click the more options ![]() button, revealing options to either Edit the stage or Remove it.
button, revealing options to either Edit the stage or Remove it.
Stage Components
Components are external files used to build the 3D environments with, in the stages.
Adding a Component
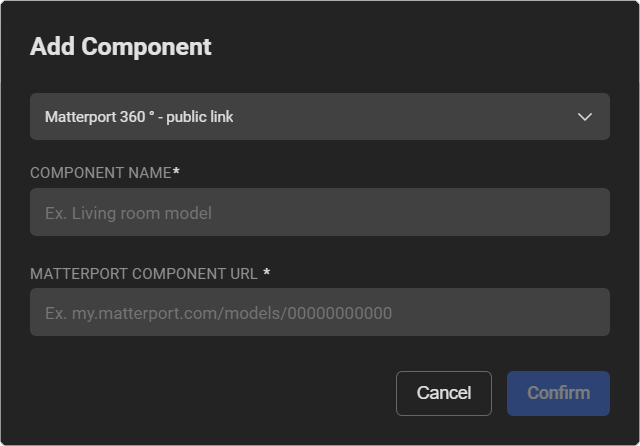 To add a component to the project, press the
 ![]() button that will open the upload window, from where you will be able to add a Matterport Virtual Tour to the project. Here you can either add a public or private Matterport Virtual Tour Component.
button that will open the upload window, from where you will be able to add a Matterport Virtual Tour to the project. Here you can either add a public or private Matterport Virtual Tour Component.
Adding a private link requires you to log in to your Matterport Account and follow the authentication steps
To add other types of the components see the Desktop version
Editing a component
 By pressing more options
 ![]() button located at the far left side of the component row, we can access additional actions, such as:
button located at the far left side of the component row, we can access additional actions, such as:
- Delete synchronization: removes the current synchronization of the component.
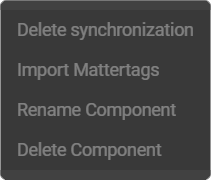
- Import Mattertags: Imports tags. Only for Matterport Virtual Walks Components
- Rename Component: lets you change the name of the component.
- Delete Component: deletes the component permanently.
Component file formats
This is the list of all the supported file formats for every component type.
To add different kinds of components to the stage, see Desktop version
|
3D geometry file formats |
|
| BIM object file formats |
|
|
2D digital image file formats |
|
| Document file formats |
|
| Pointcloud file formats |
|
To manage all the files within a project see Documents page to learn more about File Browser.
