Annotations
Create and manage Annotations to communicate with other users on the project.
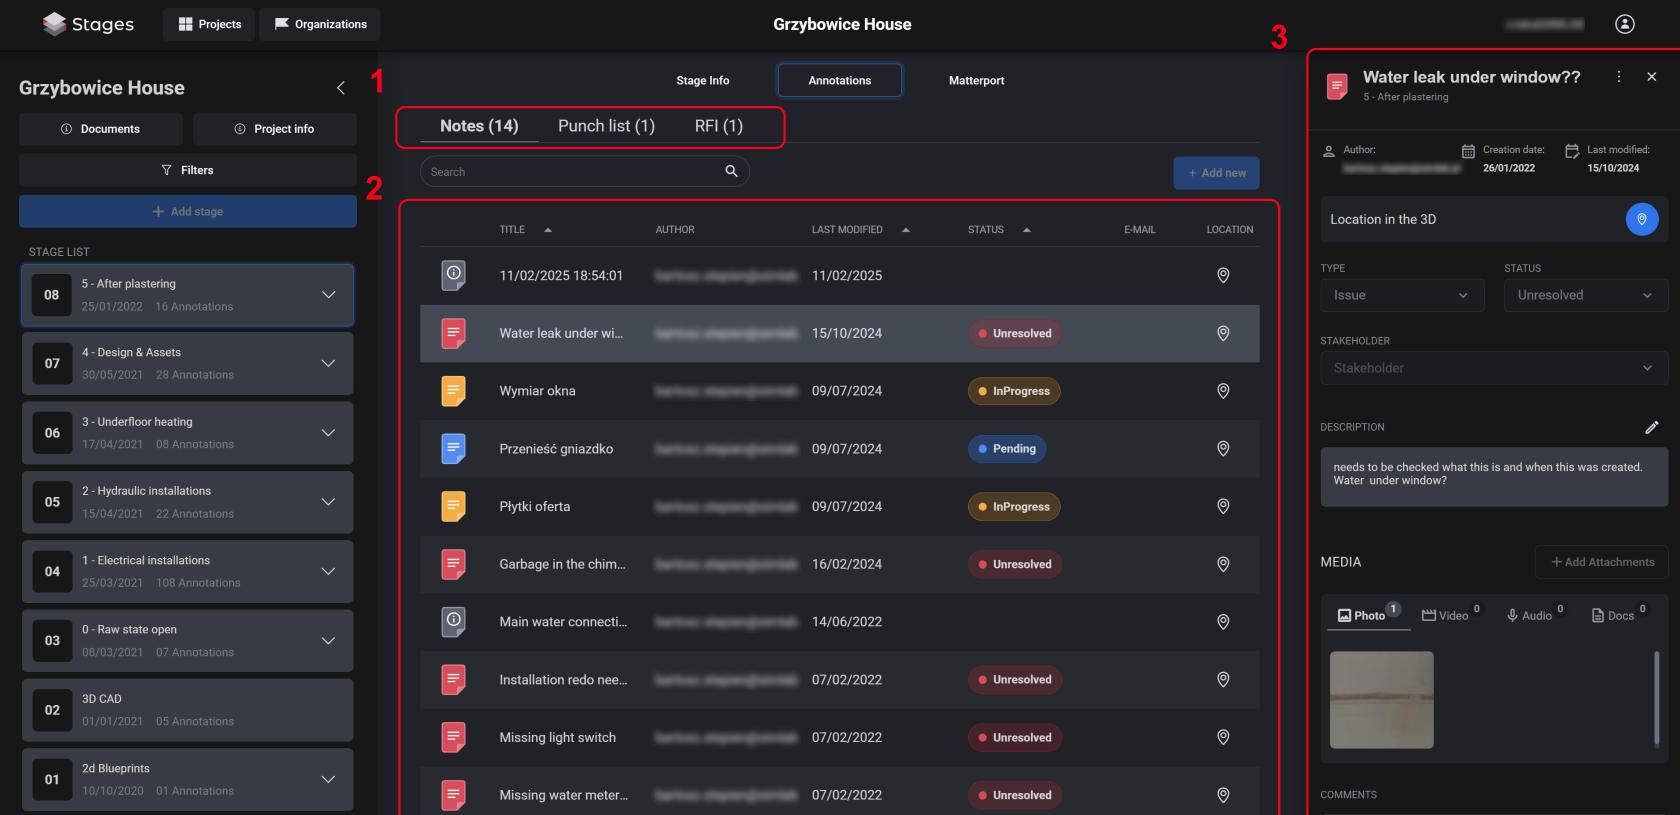
Overview
- Annotation types - used to switch between different types of note items.
- Annotations List - displays the annotations for to the selected stage and type.
- Details Side Panel - main panel for annotation information.
Annotation List
Comprehensive list of every annotation available in the project. Depenging on the type of the Annotation selected to list, different variables will be displayed
Notes List Description
The note list displays all the necessary information to find the specific note you are looking for. The notes are displayed in rows, starting with the notes Icon, followed by the note name. Further on we can see the author of the note and when was the last time it was modified. Note Status is next, followed by two icon columns: E-Mail notifications and Location assignment, indicating if these are present within the note, when there is an icon displayed.

You can sort the notes by Title, Last Modified and Status (As seen on the screen above)
Note Creation
To create a note, press the ![]() button at the top of the Note List. An empty Note Details side panel will expand, where you will be able to set all the necessary information as described earlier above.
button at the top of the Note List. An empty Note Details side panel will expand, where you will be able to set all the necessary information as described earlier above.
When creating a Note, the Note Name will default to the date and time of the Note creation. You can change these anytime
Note Details Panel
Main body of the Note, containing all of the main Note Features.
Note infoThe top section is dedicated to all the general comment information
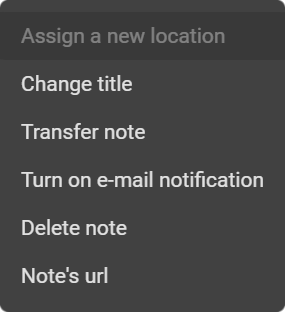
The more options
The Note transfer lets you move the note between stages, while Note's url copies the note's web link for quick sharing. You can toggle the e-mail notification from here as well.
If the notification's on, the message Notes can be pinned to the surfaces in the 3D space. Location
See Matterport section for Note placement in 3D
Right next to it are located tabs displaying the Note Type and it's Status. You can expand each of them to see all possible options as well as change them from here.
Stakeholder can be set from the list of available users in this tile.
Lastly there's the note description, that lets you describe the matter of the note.
Having necessary permissions, an edit
See the User Roles for more information on permissions |
|
 as seen on the panel screenshot to the right.
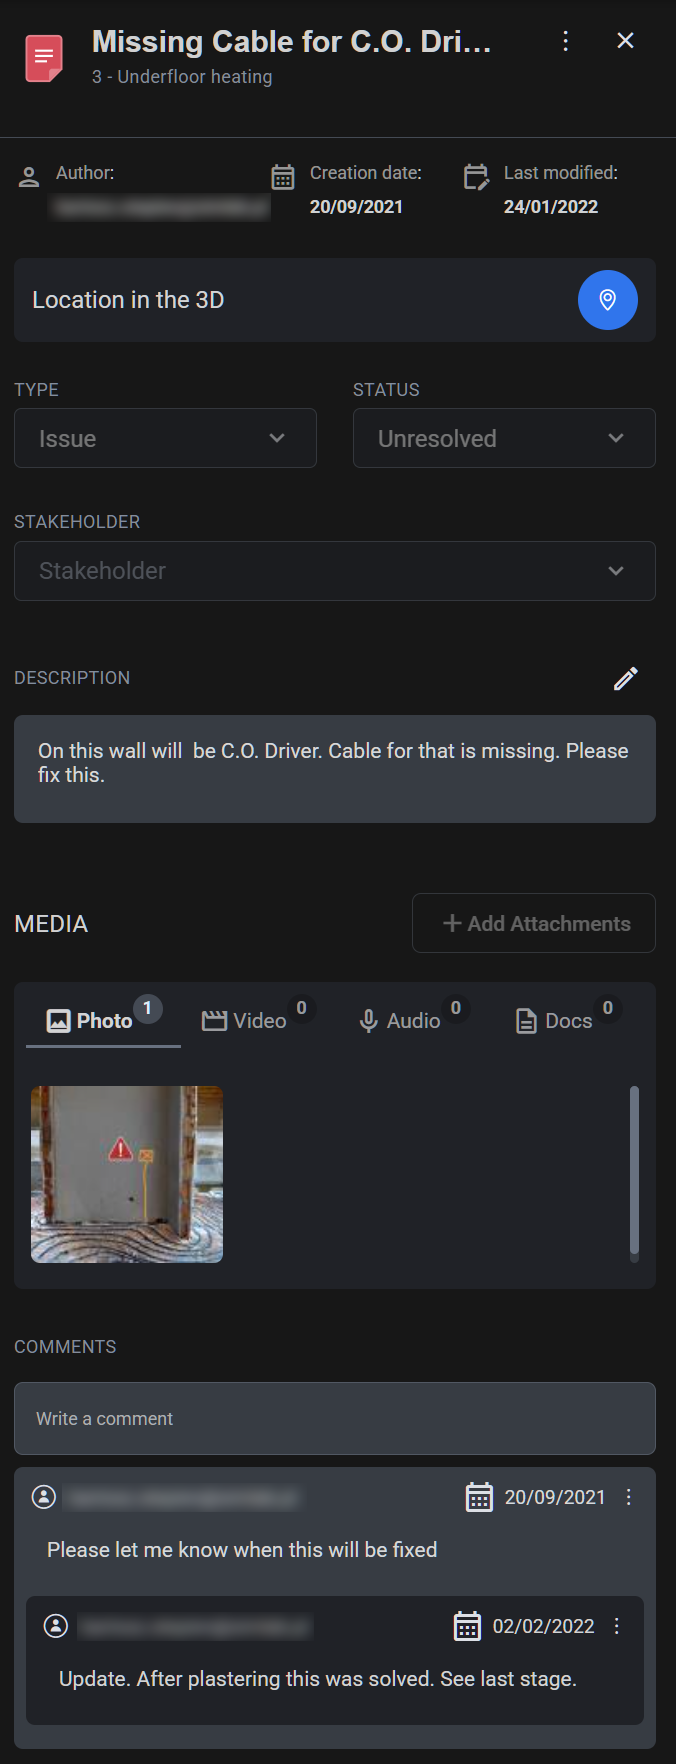
Media
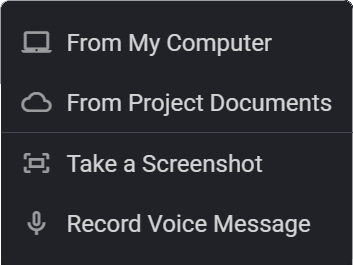
The media section is dedicated to attachments. From here you have two options to choose from where you will add the files: From your PC or Project Documents. You can add: images, videos, audio files and text documents.
Additionally there's an option to take a screenshot and record an audio file. To >>>
To access these actions, press the ![]() button, located next to the Media section title.
button, located next to the Media section title.
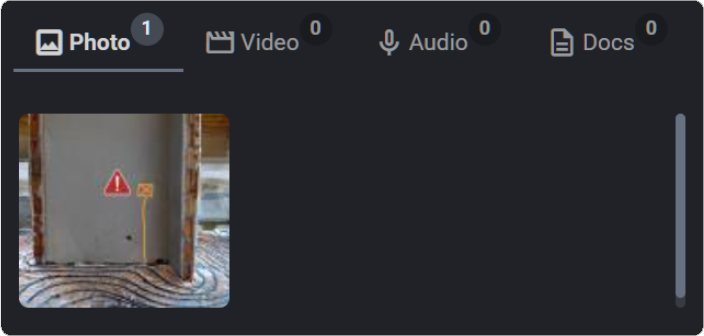 Media files, attached to the note are then displayed in the following section, grouped by type of the selected file family together with their total number as seen here >>>
You can browse through every external file uploaded to all of the notes in the project (and components) with the use of File Browser located in the Documents View.
Comments
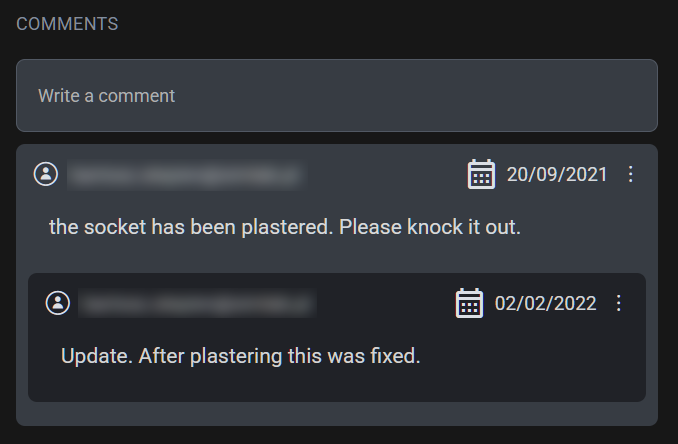
Comment section lets you communicate with other project users. Each comment shows it's author, time it was created. If the post was edited or deleted, it will be displayed as well.
Edit and delete actions are located in the more options ![]() icons.
icons.
Replying to a comment will notify the comment author
Procore
To access Procore features, both your Account and Project are required to be linked with Procore counterparts
With procore integration come two additional, Procore specific, annotation types: Punch lists and Requests For Information (RFI)
![]()
These Annotations will be listed in the similar manner as Stages Notes but with Procore specific information types:

Learn more about Procore integration features and how to link your projects